Scattering
Emitters
What’s an Emitter?
An Emitter is any object that defines where assets are scattered in Arborea. Typically, this is a mesh object like a plane, terrain, or any custom surface in your scene where you want to scatter assets.
Once selected as an emitter, the scatter system uses the geometry of that object to distribute instances across it.
You can have as many different emitters as you want within your project.
Switching Emitters
In Arborea there are two ways you can set/change emitters.
The first is with the Emitter object selector dropdown/ eyedropper.
Either select an object in the dropdown menu
Or you can use the eyedropper to select an object in the viewport.
Scatter Quick Add Menu
The second way to set/change emitters is using the Scatter Quick Add menu.
Select the object you want to make an emitter
Use (ALT + Q) to open the quick add menu
Select “Set as Emitter”
There are other options in this menu as well that are covered later on this page
Multi-Emitter Scattering
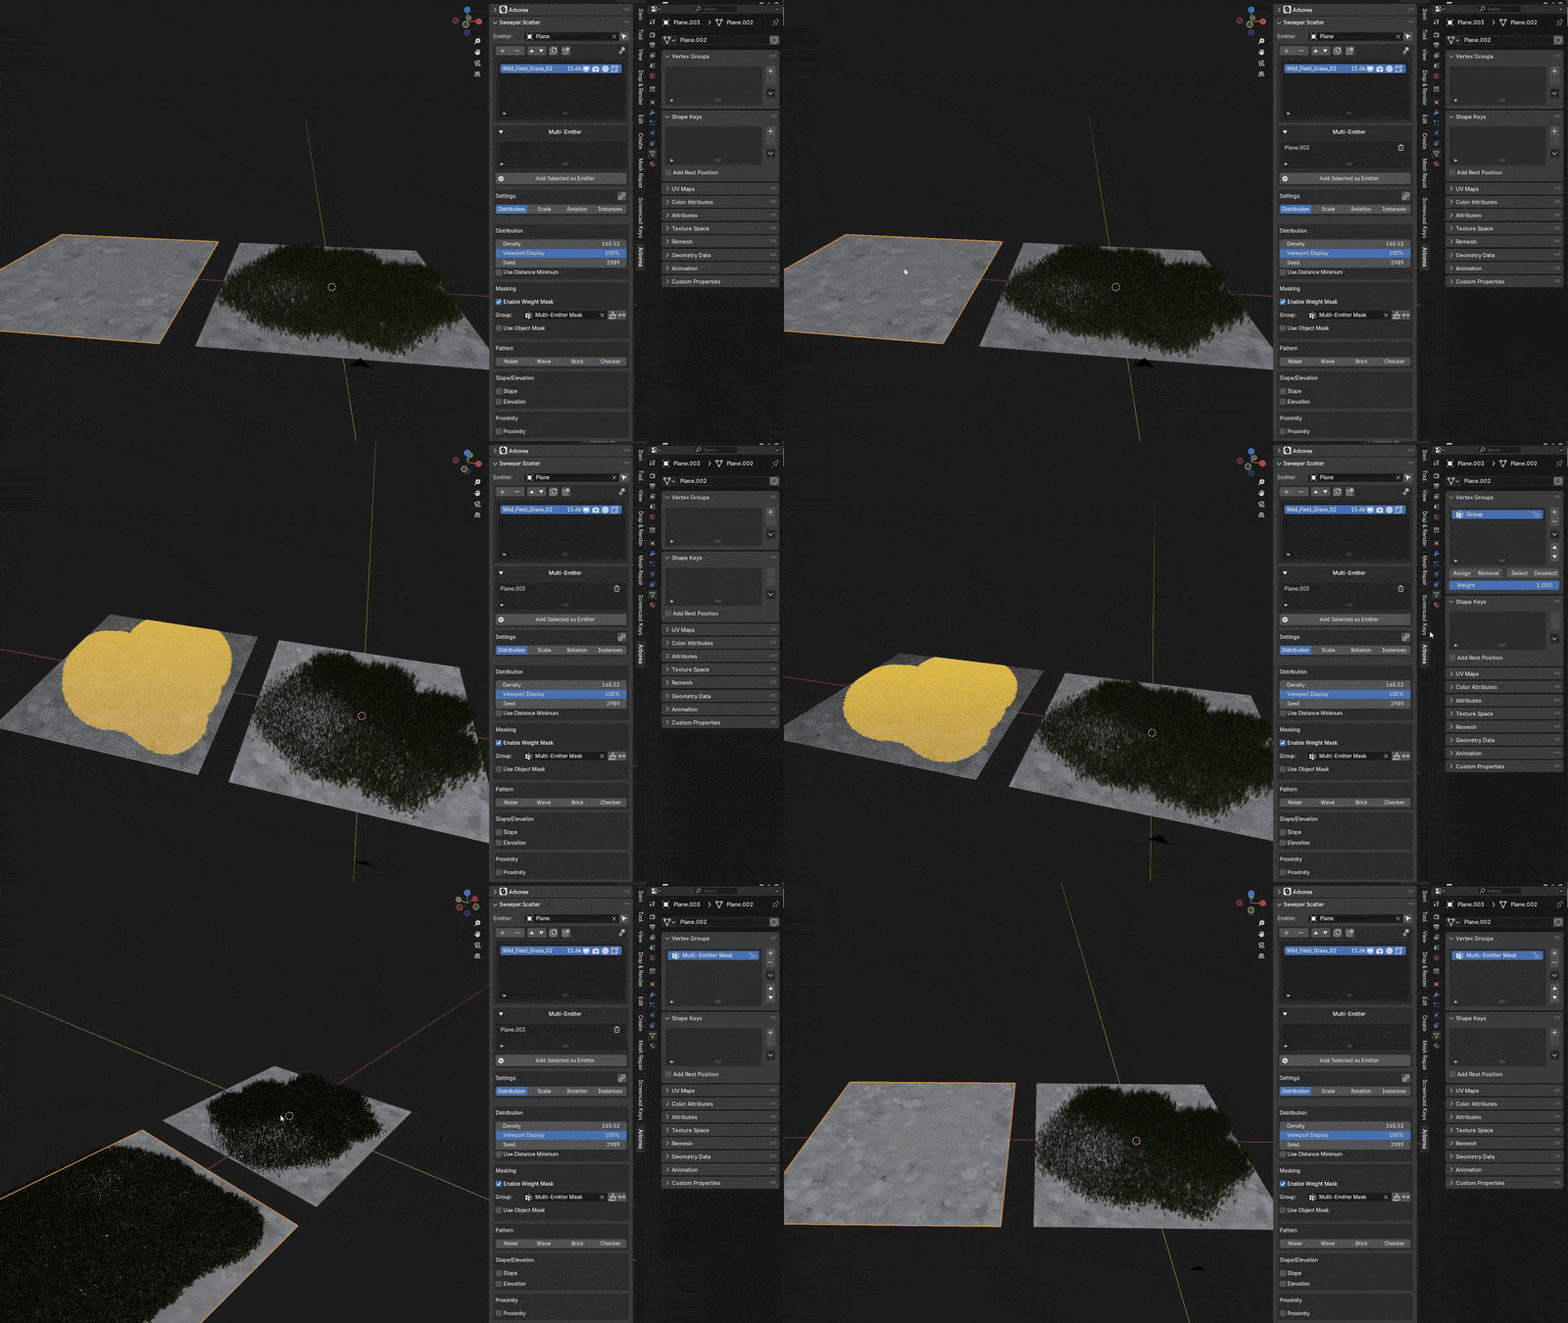
With Arborea, you can use multi-emitter scattering to apply a single scatter system across multiple objects or terrain pieces at once. This makes it easy to manage large environments while keeping everything unified under one system.
Simply select the objects you want to add as mulit-emitters and click “Add Selected As Emitter” in the multi emitter section.
Alternatively you can use the quick add menu for this as well, see section above.
Weight painting with Multi Emitters
If you add a new emitter to a system that uses weight masks, the scatter might not appear on the new object.
This happens because each emitter must have a vertex group with the exact same name that the system is using for its weight mask.
Make sure to create or assign the correct vertex group on each additional emitter for the scatter to work properly.
Adding Scatter Systems
Adding & Removing Systems
There are a few ways to add scatter systems in Arborea
The first is by selecting the “+” button to add the selected objects as a scatter system.
Select objects you want to scatter.
Click the + button
Scatter Quick Add Menu
Alternatively you can use the quick add menu with “ALT + Q” and clicking “Add Scatter System”
Select objects you want to scatter
Use “ALT + Q” to open the quick add menu
Select “Add Scatter System
Alternatively you can use the quick add menu with “ALT + Q” and clicking “Add Scatter System”
Select objects you want to scatter
Use “ALT + Q” to open the quick add menu
Select “Add Scatter System
Scatter Groups
You can group your scatter systems in Arborea. This is helpful for organizing different system types, as well as for group syncing.
Creating a group - Select your system and click the “Add to Group” button (the collection icon)
Adding systems to a group - when a group is already created, you can select a non grouped system and then click the + icon in the group header to add that system to the group.
Renaming a group - CTRL + Click the group header to rename
Group Sync - In Arborea you can sync all systems within a group. Each section will have a sync button on the top right, this will copy those exact settings to all other systems in that group. This is good for things like weight groups, culling options, and any other settings that your other systems would need identical settings for.
System Sync
You can sync any settings with other systems in Arborea. You can do this simply by clicking the sync button on the top right of every settings section.
Group Sync - In Arborea you can sync all systems within a group. Each section will have a sync button on the top right, this will copy those exact settings to all other systems in that group. This is good for things like weight groups, culling options, and any other settings that your other systems would need identical settings for.
Emitter-wide Sync - This works very similarly to group sync, but instead of only syncing within a group, you can sync all systems regardless of there being groups or not. To turn on emitter-wide sync click the “emitter-wide sync” button on the top right of the main settings tabs (the link icon)


